The timing of your sewing machine is essential when you look to create even stitches on a piece of fabric. Also, a well-functional timing allows the parts of your machine to work in unison, producing a better result. However, the sewing machine’s timing can develop faults, causing derailments in the machine’s operation.
If you notice these issues, you may be wondering about how to repair sewing machine timing. Well, you can achieve this in a series of simple steps.
Here are the steps to fixing the timing of your sewing machine:
- Inspect for Other Possible Problems
- Carry Out a Timing Test to be Sure
- Prep the Sewing Machine for Repair
- Adjust the Height of the Needle bar
- Place the Timing of the Hook
- Check the Timing Accuracy Again
- Reassemble the Components of Your Sewing Machine
- Carefully Clean and Oil any Open Gears
- Replace the Machine’s Switchplate and Covers
- Run a Quick Test on the Adjustments
This article outlines and explains the steps you should take to repair your sewing machine timing. All these steps involved finding the problem, repairing the timing, and recoupling the machine.
10 Steps to Repairing Your Sewing Machine Timing
The ultimate goal of using a sewing machine is to bring out the most beautiful creations possible when making stitches. So, a properly functioning sewing machine timing is crucial to this process. But, notwithstanding its invaluable function, repairing your machine’s timing from time to time is unavoidable.
Still, it is best to diagnose and confirm the primary problem with your timing before attempting any solution. Then, after an assured confirmation, you can follow the detailed steps outlined below to properly repair your sewing machine.
1. Inspect for Other Possible Problems
It is always a good idea to look out for other issues that manifest, like machine timing problems. Here, you can understand if you’ll have to take your machine apart or not. But, of course, this would save you a lot of time and effort if you were after a false alarm.
Watch out for broken or bent needles, and look out for incompletely inserted needles or unscrewed needles. Unfortunately, these small issues could mask themselves as washing machine timing problems, creating irregular stitches as well.
Also, check if your machine’s bobbins are correctly in place. This is because placing them backward or upside down causes the machine to work improperly. Finally, do not forget to inspect the weight of your thread, the kind of needle, and the fabric. If these are incompatible, replace them, but remember that heavier fabrics need larger threads and needles.
2. Carry Out a Timing Test to be Sure
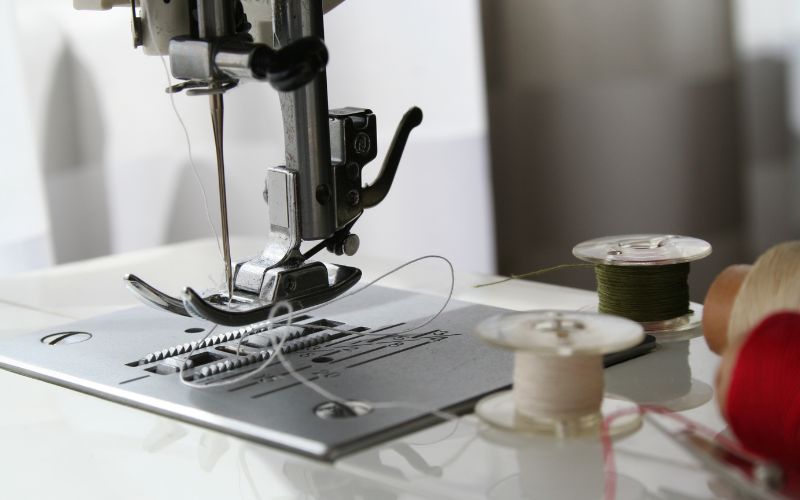
You can always ascertain if your sewing machine requires a timing repair by checking the alignment of its shuttle hook and needle. To do this, take out the base covers, switchplate, and bobbin case while allowing the needle to remain threaded.
Next, slowly move the hand wheel around to ensure the hook smoothly holds the thread. Well, if the shuttle hook does not achieve this, you must repair your machine’s timing.
Then, measure the settings of the timing with a ruler. Next, place the needle at the most downward position using the hand wheel before elevating it by 3/32 of an inch. Usually, the hook has to catch the needle right above the opening when placed at this point. So, if this is not the case, you would have to repair the machine’s timing.
Also, it is essential to observe the direction of the hook’s rotation. For example, if the hook’s rotation is clockwise, you must position the needle on the far right. Likewise, you must position the needle on the far left if the hook rotates counter-clockwise. If the needle’s position doesn’t correlate with the direction of the hook’s rotation, you might have timing issues.
3. Prep the Sewing Machine for Repair
You’ll have to make your sewing machine ready for work if you decide to fix its timing. For one, you may have to move the position of the stitch to a linear stitch. This ensures that your needle moves through the middle of the hole on the switchplate.
On the other hand, you may have to place your needle at the most expansive zigzag placement. Nonetheless, checking with the guidelines of your manufacturer allows you to understand better.
Now, take out the cover of the needle bar, the bobbin, the switchplate, and the cover at the bottom of the sewing machine. Then, collect the needed materials, including a ruler, tiny flathead screwdrivers, a flashlight, and sewing machine oil.
4. Adjust the Height of the Needle Bar
A lot of sewing machines carry marks that tell the needed needle bar height. Also, the device user manual provides direct instructions on finding and unfastening the needle bar.
So, if there are timing marks on your sewing machine, you should unfasten the needle bar and push it down or up. This is done to align the upward timing mark under the base of your machine’s timing bar bushing.
On the other hand, if timing signs are absent, completely push the needle downward using the hand wheel. Then, lift it by 2.4 mm. Ensure to play around with the needle’s height until the needle’s eye reaches 2.4 mm below the hook point. You could mark the spot on the sewing machine for easy identification whenever you need to adjust the needle bar.
5. Place the Timing of the Hook
When it comes to placing the hook timing, different sewing machine models use varying ways. Nonetheless, there is a quite generalized way of solving this problem. This approach involves adjusting the space between the needle and the hook.
First, use the hand wheel to lower the machine’s handlebar to the lowest possible position. Then, unfasten the gears at the bottom of the sewing machine. Next, adjust the needle and hook until they are both at a reasonable distance apart from each other. This distance depends on the kind of machine but usually ranges from 0.04 mm to 0.1 mm.
6. Check the Timing Accuracy Again
You can find out if the made adjustments have created improvements in the settings of your machine. This is done by simply rechecking how well the shuttle hook and the needle have aligned.
If you initially took the thread out of the needle, place it back and make a stitch while your machine’s bobbin case is still unfastened. Now, steadily turn the hand wheel to see if the machine’s shuttle hook smoothly catches the thread at each point. If this is the case, the timing has been repaired. If not, repeat the previous processes for the desired results.
7. Reassemble the Components of Your Sewing Machine
To reassemble your sewing machine, carefully fasten all the screws you initially took out. Always ensure that there are no screws or parts left out after reassembling. Also, make sure to place each component and screw it in its rightful place. So that notwithstanding, place these parts in the reverse order as you took them out.
8. Carefully Clean and Oil any Open Gears
Before placing all the covers back on your sewing machine, clean the exposed parts of the machine. To do this, you should take out any debris or lint that may lodge in the gears and feed dogs. A soft brush is quite handy when cleaning machine parts as it produces the desired results without any form of damage.
Next, study the user’s manual to find the exact areas that need some lubrication and add sewing machine oil. Always avoid using other kinds of oil apart from the required sewing machine oil to lubricate your machine.
9. Replace the Machine’s Switchplate and Covers
Carefully fit back your sewing machine’s covers and switchplate, and fasten them accordingly. Ensure to tighten the screws to prevent damage to internal components that may result from subsequent exposure to air and dirt. In addition, timing issues may develop again if the sewing machine parts do not align or install properly.
10. Run a Quick Test on the Adjustments
After you’ve repaired your sewing machine timing, thread the machine and sew a piece of material, or make a quick stitch. The issue has been resolved if these stitches come out evenly, with no skips and needle breakages. However, if the problem persists, there is a need for additional adjustments.
A series of constant faults on your sewing machine timing would subsequently warrant the services of a repairman.
Conclusion
Repairing the timing on your sewing machine is an achievable do-it-yourself exercise that only requires a series of simple steps. So, you do not always have to pay hefty sums for minor repairs. This is because this process isn’t as complex as one would imagine. Although you should always glance through the machine’s warranty and the user guide before moving forward, repairing your machine’s timing by yourself is quite a thrilling experience.
I hope that you found this article helpful and that you’ve been able to repair your sewing machine timing. Well, you should always ensure to follow these steps calmly and carefully for the best results.

I love to sew and write! I have been doing both for many years and enjoy sharing my passion with others. I have written for both online and offline publications including Amazon and Medium, and I enjoy sewing clothes, quilts, and other items.
My writing style is engaging and lively, and I have a knack for delivering complex information in a way that is easy for everyone to follow.


