Ending a stitch is easy when you fully understand how to do it. However, manually ending a stitch differs from the sewing machine method. Therefore, you must use the right skill and understand your sewing machine’s capacity to end a stitch before hopping in. The proper knowledge would help you acquire the right skills to end a stitch line.
If your stitches keep separating, you may wonder how to end a stitch sewing machine. Well, you can achieve this with a few simple methods.
Here are the methods for ending a stitch line on a sewing machine:
- Backstitching the Fabric
- Lock Stitching the Fabric
- Backstitching Without a Reverse Function
- Stitching the Lines in Place
This article outlines and explains the steps you should take to achieve every method to end a stitch line on a sewing machine. All these steps involve getting the right stitch for the fabric, keeping the stitch line neat, and finishing the seams.
Four Methods to Ending Your Stitch Sewing Machine
The ultimate goal of ending a stitch line is to get a flawless seam on your fabric. Ending a stitch is no rocket science; it is only vital that you know the essential components of your sewing machine and the sewing directions for the stitches.
The most vital part of stitching with any method is ending a stitch. Stitching any fabric would be useless if you don’t end it. Therefore, it is not difficult if you learn the stitching directions at the end of the fabric. Although, you could make a few errors on your first attempt.
Hence, it is best to practice severally and also understand the basic measurements to secure any stitch you make at the end. Also, you need to understand how the different sewing patterns effectively function. Then, you can follow the detailed steps outlined below to end a stitch line on your sewing machine properly.
Backstitching the Fabric
The back stitch method is the most popular method that many sewers adapt. It involves stitching the end and beginning of the fabric in a forward and backward direction. The method might be impossible if your sewing machine doesn’t have a reverse function. However, you can follow the carefully outlined steps below to use the backstitch method.
1. Machine Stitching the Fabric
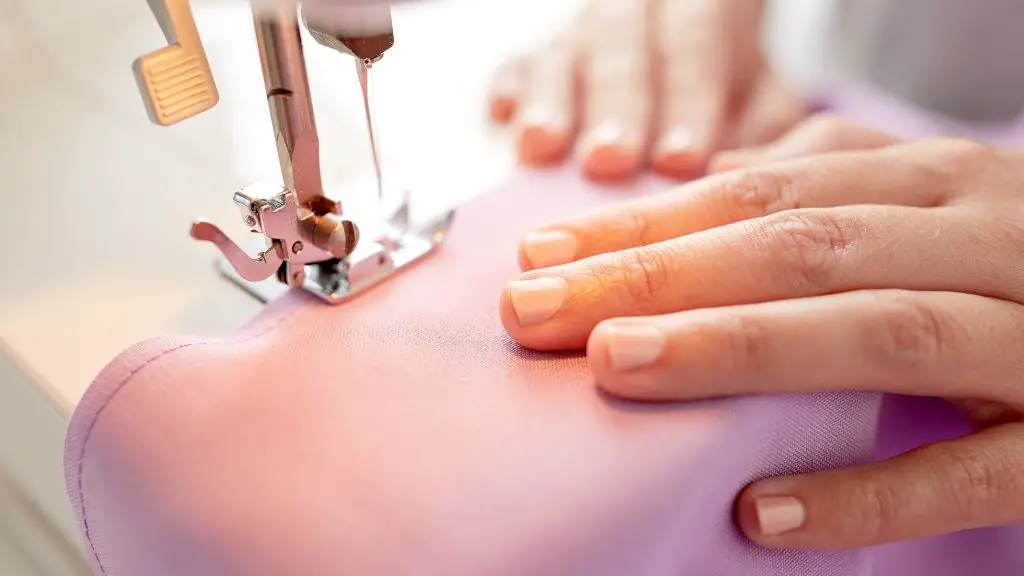
Using any stitching pattern, you find convenient when sewing the fabric is ideal. Generally, you can use either straight or zigzag stitching to begin the sewing process. To begin the process, you need to sew the fabric normally until you almost reach the end, and are ready to begin end-stitching it.
You have the advantage of joining different seams together with standard stitching lines. However, you must stop towards the edge to jam the stitch line you sew.
Next, you should stop the stitching at ¾ inch (1.9 cm) from the edge of the fabric. Stopping your stitch line at this stage would help you avoid errors. The gap is enough for you to make a back stitch on the stitch line.
2. Switch the Sewing Machine to Reverse
Switching your sewing machine to a reverse stitch is vital to carry out the next step. The reverse stitch helps strengthen the first and last stitches on your fabric. The two stitches turn out perfectly and flawlessly when you sew them while your machine is in reverse.
The type of sewing machine determines the reverse function it uses. Some sewing machine reverse function is a switch, while it is a button in some other machines. You need to locate and understand the reverse stitch function of the machine you are using.
Generally, the reverse stitching mechanism is usually at the front of the sewing unit. The location is either at the left-hand end of the unit, above the needle, middle of the machine’s faceplate. Irrespective of the position, the reverse function button is always close to the stitch dial.
The reverse button looks like a small circle with a dial and arrows indicating the stitch direction of the machine. To set the reverse function, you need to turn the reverse function knob in reverse or opposite directions. The reverse function allows the machine to stitch the line backward without having to turn the fabric around.
Cross-check the button to know if the function is properly set. Next, you can try stitching some spare fabric. Then proceed with stitching your fabric while the function is on. You need to make sure the normal stitch line you sew earlier falls under the needle before creating the reverse stitch.
In some sewing machines, you might need to hold the reverse button while using the function. Whereas you only need to press the button once in other machines. You should check your machine user’s manual to know which method it uses.
3. Backstitching the Fabric
Once your sewing machine’s reverse function is activated, the backstitches will directly work over the zigzag or straight stitches you initially made. It would help secure the sewing. Also, it is vital to make the backstitch shorter than the normal stitch so they don’t come apart.
You should adjust the backstitch length to strengthen it. It is best to sew your normal straight or zigzag stitch closer to the edge to have a shorter backstitch. You can make your backstitches with the foot pedal or hand wheel.
Although, you can use the foot pedal or hand wheel to create the backstitches. However, it is best to use the hand wheel. The foot pedal won’t give you adequate control like the hand wheel to make these few stitches.
First, position the whole fabric under the presser foot before you launch the reverse function. The presser foot would hold the fabric so the stitch line won’t fall out of place. You will have the wrong backstitch if the fabric is not in place before you launch the reverse function. Next, position the needle down and leave it like that once you launch the reverse function.
You must ensure the fabric follows the back of the presser foot and your seam guide. Backstitches could ruin the entire process of ending your stitch if you do not align the fabric properly. However, an accurate seam guide would help your stitches align and guide the movement of the fabric. Do not forget to make sure the presser foot is down before you begin stitching.
Make three to five backstitches on the fabric to lock in any seam. The backstitches would jam the normal stitch line you sew at the first stage. At this point, the initial stitches can’t separate. However, you need the next stage so your backstitch doesn’t separate.
Additionally, it is essential to know that the backstitch would fold and look disorderly if you do not keep the presser foot down. In addition, the fabric stitches would unevenly distribute and damage the result.
4. Forward Stitching the Fabric
Turn off the reverse stitch function and switch the stitch function to normal. Then sew a couple of stitches forward to the end of the fabric. You can use either the zigzag or straight pattern to create the forward stitch.
Make sure the forward stitch overlaps the reverse stitches you initially sew. Overlapping the stitches would help them lock into the fabric. It is like a series of firm lines you created with a sewing machine.
Your fabric stitches are now securely in place. The result would give you three lines of thread at the end of the fabric.
5. Lifting the Needle
Since the end stitch is successfully created, you can lift the needle. First, you must use the hand wheel and the presser foot lever to lift the needle. Now, carefully slide the sewn fabric from under the sewing machine needle. You must be careful at this stage, so you don’t pull the fabric with force and cause the stitches to rip or form a thread knot.
Cut off any last stretch of excess thread. It is best to trim the excess thread close to the edge of the fabric to get a neat result. The threads could make the fabric untidy if they are obvious.
To get the perfect finishing, make sure you press the seams properly with iron and apply a seam finish. The seam finish would help enclose the stitches and prevent them from unraveling. You now have a neat end stitch and sewing project at this point.
You can use scissors to cut off the excess thread from your fabric. However, some sewing machines have a small built-in thread cutter on the side. You only need to press the thread down on the blade to cut it.
Backstitching Without a Reverse Function
Generally, most sewing machines have a reverse function. However, some old, conventional sewing machines don’t have the feature. If you come across such machines and need to create a backstitch, here is how to make a backstitch without a reverse function.
First, you must turn the fabric around 180 degrees from the normal position and then sew some stitches. The purpose of turning your fabric is to create a backward stitch. The stitch would be identical to a reverse function stitch.
Next, return the fabric to its former position and continue sewing the remaining seam. Sewing the fabric at this position helps to create a forward stick that locks the initial stitches into the fabric.
Alternatively, you can sew a few stitches at the beginning of the seam to secure the stitch. Then, you need to lift the needle and adjust the fabric. Then, carefully move the fabric to the initial position like you are about to create the same stitches again.
Reposition the needle at the beginning of the seam. You need to make sure the initial stitches are directly below the needle. Finally, stitch over the initial stitches and continue sewing the rest of the seam. The stitches must be accurate so that they can overlap each other.
The overlapping stitches would lock into the fabric and stay secured. The result looks like a standard backstitch. Both methods are efficient; however, there is a disadvantage to creating a back stitch this way.
The only downside to this method of backstitching is that creating multiple stitches on the same spot could cause a lump or bulge at the end and beginning of your seam. Also, it may make your sewing untidy, especially if the stitches are visible on the fabric’s right side.
Lock Stitching the Fabric
Lock stitches are helpful when your sewing machine doesn’t have a reverse or backstitch function. Lock Stitching is also more durable because it uses a shorter stitch length which strengthens the stitch. Also, it is vital to understand that longer stitches are easier to pull out than shorter ones.
Lock stitches are mostly useful on transparent fabrics. Another use for lock stitches is on fabrics that have a wide drape. Back stitches would not give you the desired result because they will affect the natural drapes of the fabric. Creating a lock stitch depends on the type of sewing machine.
The lockstitch mechanism differs in different sewing machines. However, you can follow the methods below to achieve a lock stitch on your sewing machine.
1. Sewing Machine with Built-in Lock Stitch Feature
If you are using a sewing machine with a lock stitch function, the sewing machine would be able to sew a single stitch back and forth. You won’t need to repeat multiple stitches to create a lock stitch. In addition, the lock stitch feature makes ending a stitch easier on the machine.
It is best to check your user’s manual to create a lock stitch on a sewing machine with an automatic lock stitch function. It would help you understand how the stitching process works on the machine. Sewing machines with lock stitch features can sew a specific number of stitches and lock the stitch.
Also, the sewing machine stops once it achieves a particular number of stitches. However, only electronic sewing machines have a built-in lock stitch feature. Although, you can create a lock stitch on normal, manual sewing machines with another method.
2. Sewing Machine Without Lock Stitch Feature
Reducing the length of the stitches is a professional way to end a stitch on a manual sewing machine. For example, you can achieve a lock stitch by reducing the stitch length to the complete minimum on your sewing machine. Additionally, you should be able to sew two to four stitches on the same spot while the stitch length is at that level.
The best way to achieve a shorter stitch and perfect lock stitch is to set the stitch length to the lowest level to reduce the stitch length at the beginning and end of your seam. But, first, you need to identify your sewing machine’s stitch length knob. The knob usually has “length” as an indicator to identify it.
Sew two to four stitches forward on the same spot, then stop. The stitches should secure the end stitch line from unraveling, then switch the sewing machine to the reverse function. You should sew over the initial stitches two to four times. It would overlap the stitches and stop the forward stitches from separating.
Turn off the reverse feature and sew forward over the stitches again to lock the stitches. The lock stitch is now complete, and your stitch lines are firmly secured.
On the other hand, you can end the stitch by jamming the machine to make a thread knot. However, the thread knot could make your sewing appear untidy. Therefore it is best to lock and stitch the end of the fabric. Plus, lock stitching is more straightforward than creating a thread knot.
You can sew the stitch length in any stitch pattern. However, it would be best if you used straight or zigzag stitches because both stitches are easier and faster. In addition, the two sewing patterns have other advantages.
Straight stitching can be done by adjusting the stitch length of a straight stitch that can securely hold your end stitch. It can also prevent wrinkled seams and give you an overall neat appearance. You only need to set the stitch length to the lowest range.
Once your stitch length is at the minimum level, your sewing machine would make it possible to sew a lock stitch. However, using a straight stitch to achieve a lock stitch might be difficult with a stretchy fabric. So you can use a zigzag stitch instead.
On the other hand, the zigzag stitch is mostly useful as a stitch method in stretchy fabrics and as a seam finish. Therefore, adjusting the stitch length would give the zigzag stitch a different appearance. Also, it could make the stitch width look different, but it is still the same.
Reducing the stitch length would result in a bar tack. Also, you can reduce the zigzag stitch length to strengthen your fabric or create button holes. Increasing the stitch length would make the stitch almost appear straight.
It is best to test your stitch on a leftover fabric to get the perfect adjustment you need for your sewing project. It also helps you check whether the stitch breaks or stretches with the fabric. It would help to carry out the test multiple times till you get the proper adjustment.
3. Second Method for Sewing Machine Without Lock Stitch Feature
Another alternative to using a manual sewing machine to lock the end of your seams is to leave a thread tail at the seam end. It is a straightforward method. However, it is time-consuming. Although, it effectively locks the threads and secures the seams especially weak seams and fine fabrics.
Leave a thread tail at the beginning and end of the stitching line. Adjust your fabric to have enough thread lines to create a perfect knot. You can leave a longer thread line if you are not sure of your accuracy.
Pull the top end under the thread to the other side of the fabric. It would make the top thread appear like a loop on the backside of the fabric. Then, pull the loop through with a pinpoint to ensure two threads appear on the fabric’s wrong side. The top thread and the under thread should be able to contact easily when you pull the loop.
Knot the two threads tightly together with your hand. You need to trim any excess thread to neat the knot. You can also securely sew the two threads to the wrong side of the fabric with a double back stitch.
You can leave the thread lines while you sew but ensure to lock any lock stitch that needs securing by hand after you start stitching. You could ruin the stitch line if you don’t remember to lock the knots. Pull the lock stitches lightly to check the firmness.
Stitching the Lines in Place
Sewing machines with multiple stitching options make it easy to sew the end of a stitch in place. The sewing machine can do multiple types of stitches on the same spot and securely hold the seams together.
It is an ideal method that saves you the stress of creating knots. However, only modern sewing machines can carry out this function. Also, sewing your end stitch makes the fabric appear swollen in that particular spot. Finally, it makes your sewing project untidy.
Conclusion
Ending the stitch line on your fabric is easy if you follow the recommended procedures. It is best to know your sewing machine and understand the basic adjustments that the particular machine needs. Practicing with a few scraps of fabric would help you to develop the right skill to end a stitch line.
You need to practice each method and understand them perfectly gradually. It would be best if you also kept in mind that different fabrics have a unique method that works for them.
I hope that you found this article helpful and you’ve been able to end your stitch line with a sewing machine. Well, you should always ensure to use the method that you find most convenient for the best results.
I love to sew and write! I have been doing both for many years and enjoy sharing my passion with others. I have written for both online and offline publications including Amazon and Medium, and I enjoy sewing clothes, quilts, and other items.
My writing style is engaging and lively, and I have a knack for delivering complex information in a way that is easy for everyone to follow.
