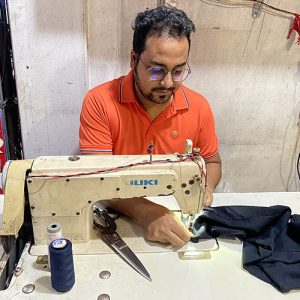
The sewing machine comprises various crucial parts that ensure effective results, and the needle is one of them. Without the sewing needle, it would be impossible for the thread to go into the fabric to create a pattern. Unfortunately, the needle is normal to wear or break while you sew.
So, you must replace the needle with another one to continue working uninterrupted. If it is your first time sewing, it may appear daunting because you might be unfamiliar with the process. Thus, you may wonder about how to get a needle out of a sewing machine. Luckily, there are simple steps to follow when you want to achieve this.
Here is the procedure for removing the needle from your sewing machine:
- Turn Off the Machine
- Locate the Needle Screw
- Loosen the Screw to Release the Needle
- Hold the Needle While you Loosen the Screw
- Remove the Needle from the Holder
- Replace the Needle And Test It
Simple Steps on How to Get Needle Out of a Sewing Machine
It is no joke that the sewing needle is an integral part of the sewing machine. Although all parts are important, the needle makes sewing possible. The sharp end allows penetration into the fabric and locks the thread.
There are electrical and non-electrical sewing machines, and their needles differ. This is because they both require different modes of operation. While the industrial or electrical machine uses electricity, the non-electrical does not.
It is also best to know that there are various needle sizes. These sizes are for different purposes, according to the type of fabric or the thread. For instance, a fabric with a smooth texture requires a smaller needle.
Contrarily, you would need a larger size for a thicker and more coarse fabric. So, if you have a small needle and would like to change it to a bigger size, you must remove it. To do this, follow the specific steps below to take the needle out of your sewing machine.
1. Turn Off the Machine
If you have an industrial machine, you must turn it off before you attempt to remove the needle. This will prevent you from injuries while you work. For instance, if you do not turn off the machine and step on the pedal, the needle will hurt you.
This is because the wheels automatically spin when you apply pressure on the pedal. Unfortunately, if you step on it while you are trying to remove the needle, it will harm you. Consequently, turning off the machine before performing any maintenance is best.
However, for a non-electrical machine, you can do two things. First, you can disconnect the pedal from the wheels. On the other hand, you can try not to place your legs on the pedal while you work.
Sadly, the second option is not as reliable as the first. Therefore, It is safer to disconnect the band that connects the wheels and the pedal or turn off the machine. When you do this, the chances of getting in an accident are very low.
Remember that this is rule No.1, and it can never be overemphasized.
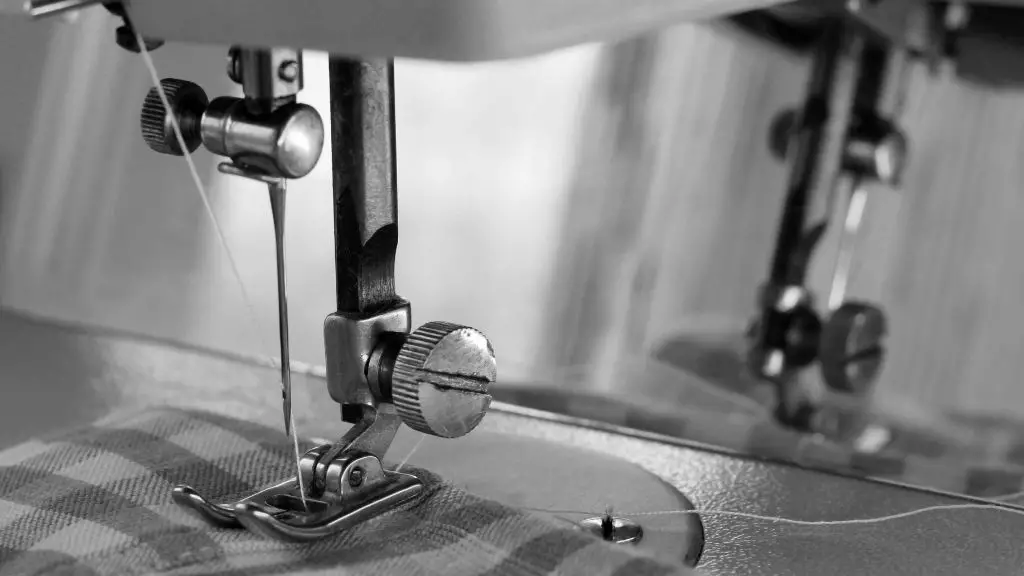
2. Locate the Needle
This step is relatively easy because the needle is not an obscure machine part. It is sharp and pin-like and is perpendicular to the base of the board. This is the same for both electrical and non-electrical sewing machines.
If there would be any differences, it may be the positioning of the needle by a few inches. Its positioning depends on how you place the machine for a manual Singer machine. However, the needle must always be on the right side.
Although I cannot say the same about weaving machines, it differs because of the setup. They are more obscure than sewing machines and in line with more than one thread reel.
So, once you locate the needle on your sewing machine, you can proceed to take it out. However, you must be careful with the sharp end, so it does not prick you during the process.
3. Loosen the Screw to Release the Needle
Next, you must locate the screw holding the needle and loosen it to free the needle. The screw is a small round metallic object on the right side of the needle holder. If you twist the screw clockwise, you are loosening it.
On the other hand, if you turn it in the opposite direction or anti-clockwise, you are tightening the needle. This is because the needle stays in a port that the screw supports. This way, it provides housing for the needle and determines if it will stay in place.
We are interested in loosening the screw in this article, so you must turn it in the clockwise direction.
4. Hold the Needle While You Loosen the Screw
One important thing to note while loosening the screw is that you must hold the needle while at it. This prevents the needle from getting lost during the process. Previously, I had a hard time searching for my needle in a bid to remove it.
I left the needle plate open to have enough access to the needle, but I did not hold it during the process. So, unfortunately, it fell into the hollow board, which was full of my junk, talking of a needle in a haystack.
It took me a while to locate it, and precious time went by. Then, another time, I never found the needle. So, finally, it is best to close the slide plate even if you will hold the needle. This is because you may want to reduce the scope that you will search for your needle if you lose it.
Ultimately, I realize it is better to be safe than sorry. So, it would help if you held the needle while loosening it to avoid such a similar situation. Even if you do not open the slide plate, it can bounce away when it hits the plate.
5. Remove the Needle from the Holder
As you continue twisting the screw in the clockwise direction, gently pull the needle out but do not force it. You might break the needle or injure yourself if you apply too much pressure. It would be best if you unscrew for a while and pull the needle only when you feel it becoming loose.
For some machine brands, you may need a screwdriver to tighten or loosen it. Other times, you will require a wrench plier. To use a plier, open the wrench to the size of the needle bar and hold it securely.
You can secure it by tightening the plier as soon as it holds the screw in place. Next, slowly turn the wrench towards yourself until you feel its grip lose. When you are done, you can remove the needle.
6. Replace the New Needle And Test It
One of the reasons why you would remove the needle is when you want to replace it. So, replace it after you remove it. But, first, you must get the size you want before removing the previous one.
Next, loosen the needle screw and put it into the needle bar. The bar has a port that houses the needle. It connects the screw and holds it to the bar.
When you loosen the screw, place the needle in the port until it can go no further. This is because if you do not put it all the way, it will break or bend during sewing. Also, if the needle contacts the slide plate with force, it will bend or break.
Also, if you do not push it all the way, it will remove during sewing and stick into your fabric. When this happens, it often makes the needle end blunt and renders it useless.
Another crucial thing to note is that a sewing needle has two sides. One has a flat side, and the other is round. The flat side must face the back, while the round side must face you. Therefore, if you do not fix the needle correctly, you will continue to experience problems.
When I made a common mistake like this, it was a disaster. I could not figure out the problem. Unfortunately, a lot of needles had an unpleasant time. I had to call a technician, and they only spent two minutes.
It was quite disappointing that I had to pay the service fee because of a silly mistake. Because of these kinds of issues, you must check certain things on your sewing machine before you call a technician.
For example, always check the reel for the thread before you begin to panic. The reason why your sewing might no longer produce thread may be because the rim is empty. So, once you replace the needle, you can take worn clothing and test to see if your sewing machine is working.
Of course, it should solve your problem.
Conclusion
Finally, it would be safe to say that the needle makes the most moves while sewing. So, it would help if you replaced it when it is no longer working. Thus, if you follow these steps carefully, you are well on your way to maintaining a perfect machine.
I hope you find this article helpful and that you’ve used this information to remove a needle from your sewing machine.
I love to sew and write! I have been doing both for many years and enjoy sharing my passion with others. I have written for both online and offline publications including Amazon and Medium, and I enjoy sewing clothes, quilts, and other items.
My writing style is engaging and lively, and I have a knack for delivering complex information in a way that is easy for everyone to follow.