A broken presser foot lifter can prove very frustrating. The presser foot lifter is an essential part of the sewing machine, and it has to function properly if you’re to make the most of your machine. If your presser foot lifter malfunctions, it can cause your machine needle to break, and you’ll have trouble keeping your fabric in place.
But, if it breaks down, you shouldn’t be too alarmed because the issue is quite common, and you can fix it with ease. Following the steps below and understanding how to fix presser foot lifter on sewing machine is a pretty easy venture.
Here are the steps to repairing the presser foot lifter on your machine:
- Prepare Your Tools
- Unplug Your Machine From Power Source
- Remove the presser foot from the sewing machine
- Take out the screw holding the presser foot lifter
- Remove the presser foot lifter from the sewing machine
- Check the presser foot lifter
- Wipe the presser foot lifter with a piece of clothing and machine oil
- Put the presser foot lifter back on the sewing machine
- Plug the sewing machine in and test run it
- Lubricate the presser foot lifter with machine oil
- Adjust the tension
- Get a new presser foot lifter
How To Fix Presser Foot Lifter On Sewing Machine
The presser foot lifter is the part of the machine that holds your fabric in place while you’re sewing. If you attempt to sew with a broken presser foot lifter, the process will be slow, and you will get uneven results. This is because the fabric will keep moving around, and your machine needle will break. So, a broken presser foot lifter is not only stressful but dangerous.
If you have a broken presser foot lifter, you must fix it. Here, you’ll find a complete guide on fixing the presser foot lifter on your sewing machine.
1. Prepare Your Tools
First, you must ensure that everything you’ll need to repair the presser foot lifter is available. So, you’ll need a piece of fabric you won’t use again, a Philips head screwdriver, a flat head screwdriver, and some machine oil. When you have all the materials, you will work faster, and the task will be much easier.
Gather all these items and put them within reaching distance of the machine. A regular one will also suffice if you don’t have a Philips head screwdriver. However, you’ll need all these items before you begin working.
2. Unplug Your Sewing Machine From The Power Source
Before you start working, disconnect your sewing machine from the power source to avoid accidents. The power outlet is usually on the wall. If you inadvertently turn on the sewing machine while you’re working on it, it can cause injury. So, remove the sewing machine cord from the power outlet.
Ensure you turn off the wall outlet before removing the cord to be safe. Then, turn off the sewing machine as well. To do that, check for the power button on the sewing machine and tune it off. Once everything is off, you’re good to go.
3. Remove The Presser Foot From The Sewing Machine
Now you’ll start the actual process of fixing the presser foot lifter, and the first thing you have to do is to remove the presser foot from your sewing machine. And you can do that in the following easy steps.
- First of all, raise the presser foot lever.
- Press down the release lever with your thumbs. You will find the release lever behind the presser foot.
- Once you’ve pressed the release lever, the presser foot will be freed from the machine.
- Gently pull the presser foot from the shank and remove it.
- In some cases, the presser foot may be stuck. You can use a flathead screwdriver to pry it off and place it aside.
4. Remove The Screw Holding The Presser Foot Lifter
Next, you must take out the screw holding the presser foot lifter to the sewing machine. The screw is on the back of the presser foot lifter. You’ll need to use a Phillips head screwdriver to remove it. So, get your screwdriver and unscrew it. If it isn’t too tight, it should come off easily.
But, if the screw doesn’t come off, you may need to use pliers to remove it. Get a pair of pliers and turn gently from side to side. That should loosen it up. Once you remove the screw, place it aside. Place it somewhere you can find it when you need to put everything together again.
5. Remove The Presser Foot Lifter From The Sewing Machine
You have to remove the presser foot lifter from the machine. Removing the presser foot lifter is the only way you can find out the problem with it and fix it. To remove it, you’ll have to take out the needle plate. To remove the needle plate, loosen the screws that hold the needle plate in place. There are two screws, but removing them should be easy. Use a flathead screwdriver for that.
Next, you have to find the presser foot lifter shafts. One shaft is on each side of the presser foot lifter, just below the needle plate. Get the flathead screwdriver and remove the screws that hold the presser foot lifter to the machine. Once you remove both screws, you should be able to take off the presser foot lifter from the machine.
6. Check The Presser Foot Lifter For Any Damage
Once you’ve taken the presser foot lifter from the machine, the next thing to do is to inspect it and ascertain if there is any damage. Most likely, the presser foot lifter isn’t working because it is damaged. So, if you notice that it is bent out of shape, rusted, damaged, or just not functioning as it should, it may need to be replaced.
So, inspect it carefully to see if there is any damage. If you don’t find any severe damage, you can repair it instead of getting a new one.
7. Clean The Presser Foot Lifter
If there is no damage to the presser foot lifter, the next step is to give it a very good cleaning. Since there is no damage, the presser foot lifter could malfunction because it is not clean enough. In addition, with time and usage, debris and dirt could build up in the presser foot lifter and make it malfunction or become stuck. So, clean the presser foot lifter carefully to be on the safe side.
You can use a piece of clothing to wipe it down, and if there is a lot of clogged dirt and debris, you can use some machine oil for better effect. Also, you can try using some vinegar to clean the presser foot lifter to ensure you get all the dirt.
8. Put The Presser Foot Lifter Back On The Sewing Machine
After you’ve cleaned the presser foot lifter and ascertained that it is not damaged, you can put it back on the machine. First, you’ll have to place the presser foot lifter in the hole and secure it. To secure the presser foot lifter, place back all the screws you took out and use the flat head screwdriver to put them in place securely.
9. Plug The Sewing Machine In And Test Run It
Once the presser foot lifter is back on the sewing machine, you can reconnect it to a power source and test to see that it’s working properly. As long as you’re still working on the machine, you must ensure you don’t plug it in.
When you finish repairs, test it using a piece of discarded fabric. Don’t use new fabric, as the machine may not be working properly, and you may end up causing damage to the fabric.
10. Use Some Machine Oil To Lubricate The Presser Foot Lifter
If you put the presser foot lifter back on the sewing machine, you need to check if it needs to be lubricated. If there is any squeaking or sticking, the presser foot lifter is stiff, which could mean that it needs to be lubricated. Pour a few drops of machine oil into the presser foot lifter. Please don’t put in too much oil because that will make it become a sticker and get dirty very quickly.
Only lubricate your presser foot lifter after you have cleaned it thoroughly.
Try working the lifter a bit to distribute the oil evenly when you’ve put in the oil. Don’t work it with your machine needle or any useful fabric. Instead, remove the needle and use old discarded fabric to test if the presser foot lifter is well lubricated before you reweave it with your machine.
11. Adjust The Tension
When you put your presser foot lifter back on the machine, it should work properly. But if it isn’t, it could result from the tension. The tension is the part of the sewing machine that controls how tight or loose the presser foot lifter will be. So, the presser foot lifter could be too loose because the tension is loose, and it will continue to move out of place.
On the other hand, if the tension is too tight, it will also be tight and won’t move up and down or side to side. As such, the tension has to be just right. Not too loose and not too tight. You’ll have to adjust it if it is loose or tight. You’ll find the screw for adjusting the tension near the presser foot lifter.
If you want to tighten the tension, turn the screw right. To loosen the tension, turn it to the left. After you adjust the tension, try using the presser foot lifter to check if it works properly.
12. Get A New Presser Foot Lifter
Getting a new presser foot lifter will have to come in as a last resort. If you’ve followed the steps above to fix the presser foot lifter, but it still does not work, then you’ll need to get a new one and replace the old one. When shopping for a new presser foot lifter, make sure you purchase one that goes with your sewing machine regarding size and model.
Check the manual if you’re unsure of the exact presser foot lifter to purchase for your sewing machine. If you don’t have the manual, ask someone more knowledgeable about
When you get the new one, follow the instructions below to replace it.
- Remove the old presser foot lifter. But, first, remove the two screws that hold it to the sewing machine.
- Place the new presser foot lifter in the hole from which you removed the old one.
- Replace the two screws and use a screwdriver to tighten them.
- Finally, use some discarded fabric to test if the new presser foot lifter works.
In trying to fix the presser foot lifter on your sewing machine, you’ll have to remove and replace the presser foot lifter a couple of times. First, you’ll have to remove it before you can fix and afterward, you’ll have to put it back. Also, if you find out it doesn’t work, you’ll have to get a new one and replace it all over again.
You may damage the presser foot lifter or some other sewing machine part if you’re not careful. If you’re not very familiar with sewing machine repairs, the following tips should be helpful to you.
- Before you start taking things apart on your machine, check the sewing machine’s manual and ensure that the presser foot lifter is not needed to be adjusted. Otherwise, you may have a lot of trouble with a simple issue.
- Before you do anything, make sure to check the manufacturer’s recommendations. Use the recommended machine oil and in the recommended quantity. Always use a soft piece of discarded fabric when cleaning the presser foot lifter.
- If you try to fix the issue yourself, but it is persistent, you’ll have to call a technician or a professional to repair it.
- Only attempt to repair your sewing machine yourself if you are qualified to do so. If you know nothing about sewing machines, you may compound the problem instead of fixing it.
Conclusion
A broken presser foot lifter can make sewing both difficult and dangerous. If the presser foot lifter on your sewing machine is malfunctioning, you will have to fix it immediately. Well, you do not always have to pay for repairs, especially if it is a simple fix like this one.
I hope you found the article really helpful and that you’ve been able to fix the presser foot lifter on your sewing machine. Carefully following these steps will always lead to the best results.
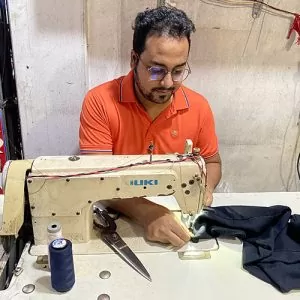
I love to sew and write! I have been doing both for many years and enjoy sharing my passion with others. I have written for both online and offline publications including Amazon and Medium, and I enjoy sewing clothes, quilts, and other items.
My writing style is engaging and lively, and I have a knack for delivering complex information in a way that is easy for everyone to follow.
